Create an invoice from a basic deal
Use this when a customer order starts as a deal — the normal path when you're working an opportunity rather than taking a straight order. The deal becomes an invoice, and revising it fills in volume pricing, shipping, and sales tax for you.
If you're creating an invoice directly, without a deal, see Create an invoice in HubSpot instead.
The worked example below is a real invoice. Your numbers will differ; the steps will not.
What you'll end up with
A deal for 100 Cooperative Coparenting Parent Guides starts at $2,495.00 — full list price. The finished invoice comes to $2,430.20, made up of:
- Cooperative Coparenting Parent Guide, 100 × $20.95 — $2,095.00
- Shipping & Handling — $209.50
- Sales Tax — $125.70
You won't type any of those numbers.
Steps
1. Create the deal
From CRM → Deals, click Add deals (top right) and choose Create new.
Fill in the deal name and leave Pipeline, Deal stage and Close date as they are. Leave Amount blank — the line items will set it.
Scroll down in the same panel to Associate Deal with and attach the Contact you're selling to and their Company. The company is what puts the company name on the finished invoice, so don't skip it.
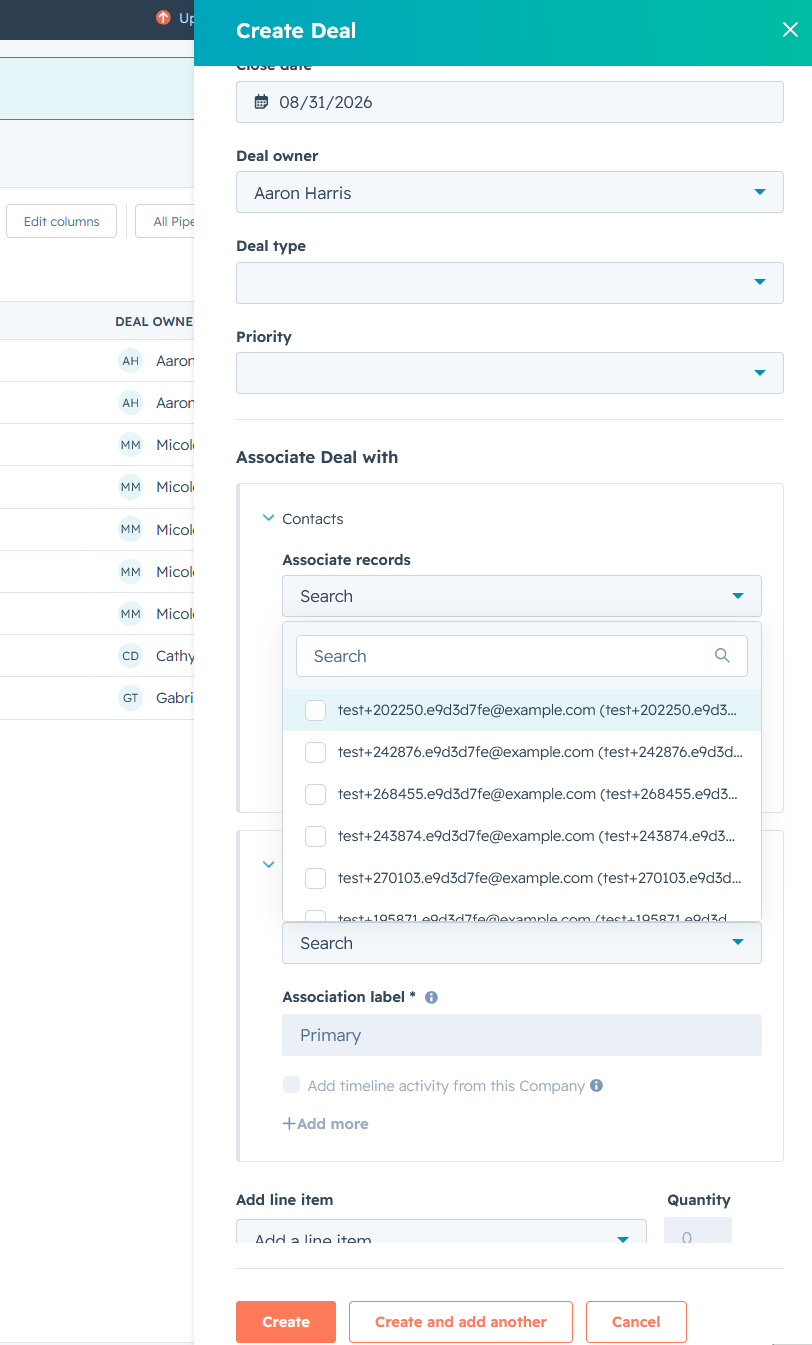
Click Create.
2. Add the products
On the deal, find Line items in the right-hand panel and click + Add, then Select from product library.
Search for the product by name or SKU.
Watch for lookalike SKUs. Searching 3703 also returns 3703DE, a distinct "Digital Edition" variant at a different price. Check the SKU column reads exactly the one you mean before ticking it.
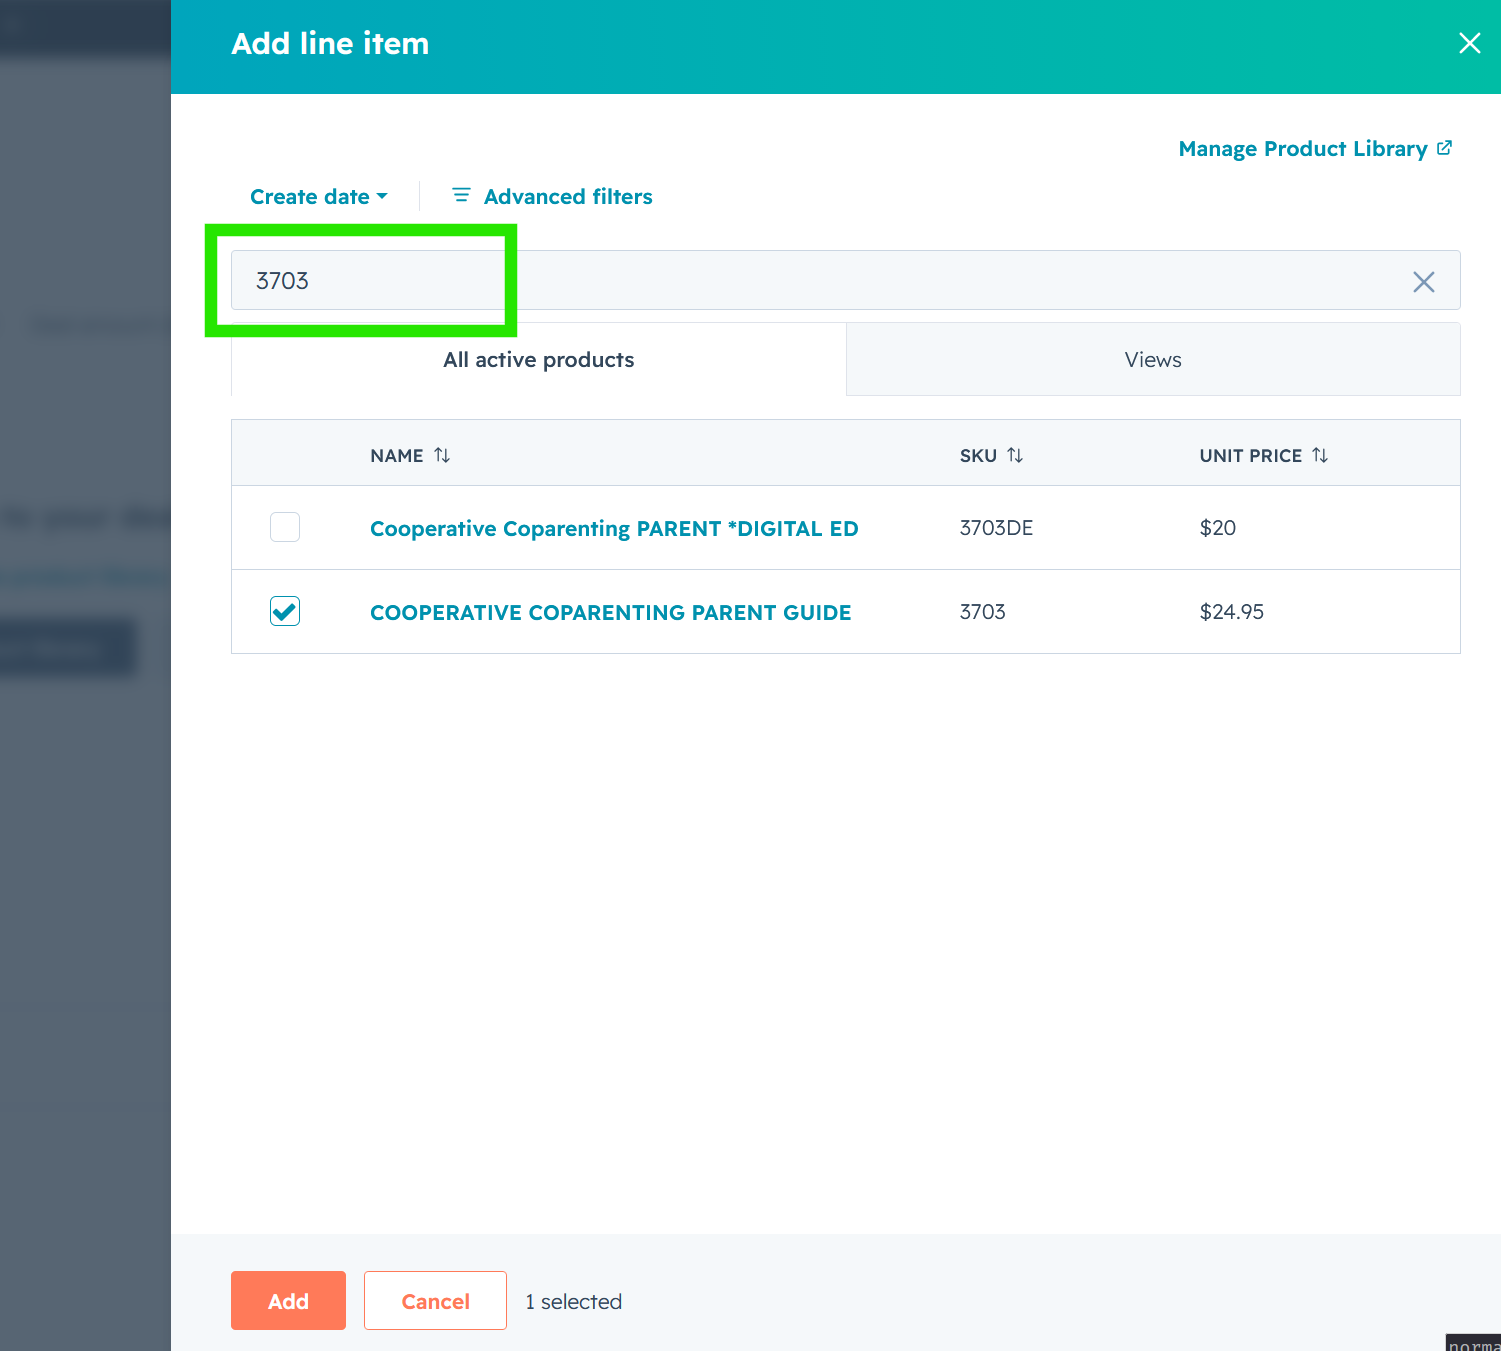
Tick the product, click Add, set the Quantity, then Save.
HubSpot asks "Update deal amount?" — choose Update deal amount so the deal total matches the line items you just added.
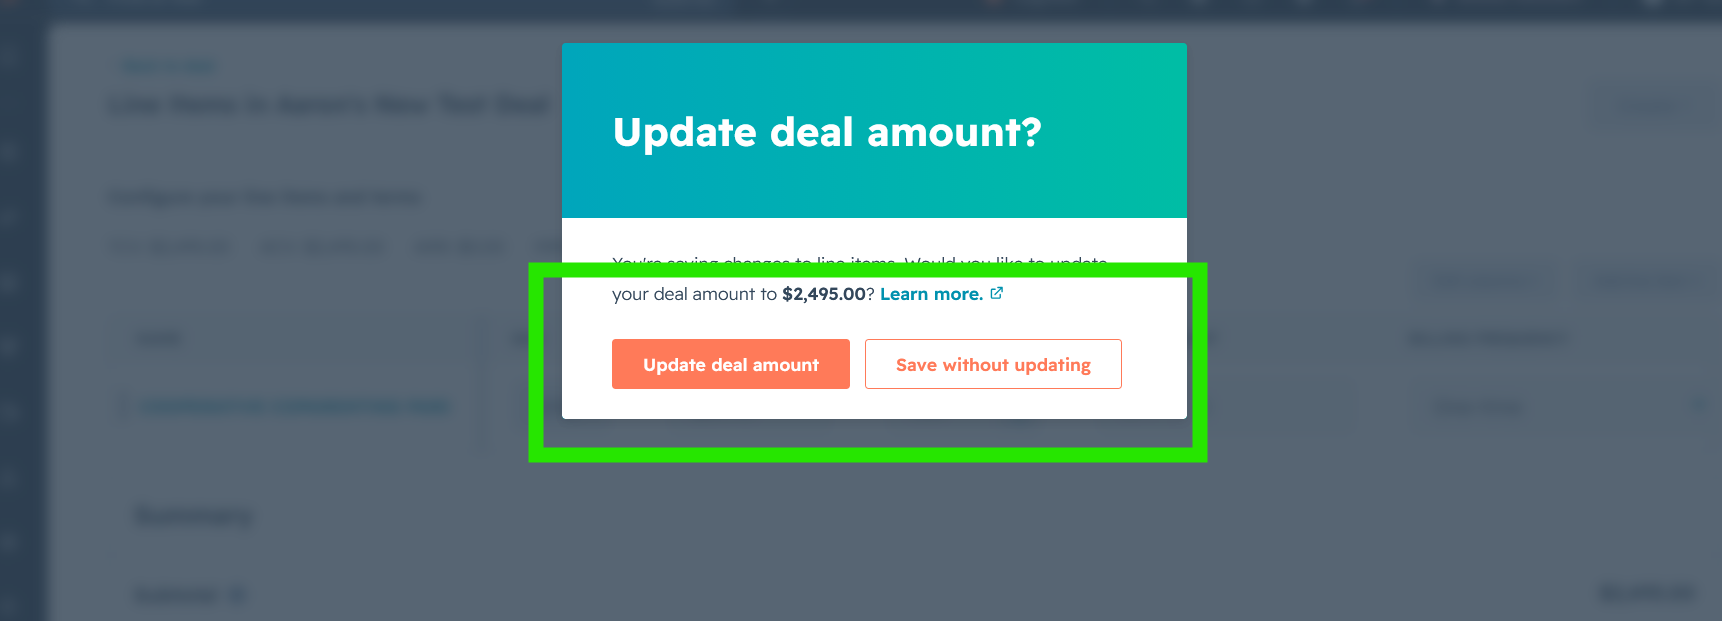
The deal now shows $2,495.00 — 100 × $24.95, full list price. No volume discount, no shipping, no tax yet.
3. Convert the deal to an invoice
Still on the deal, find Invoices in the right-hand panel, click Add, and choose Convert deal to invoice.
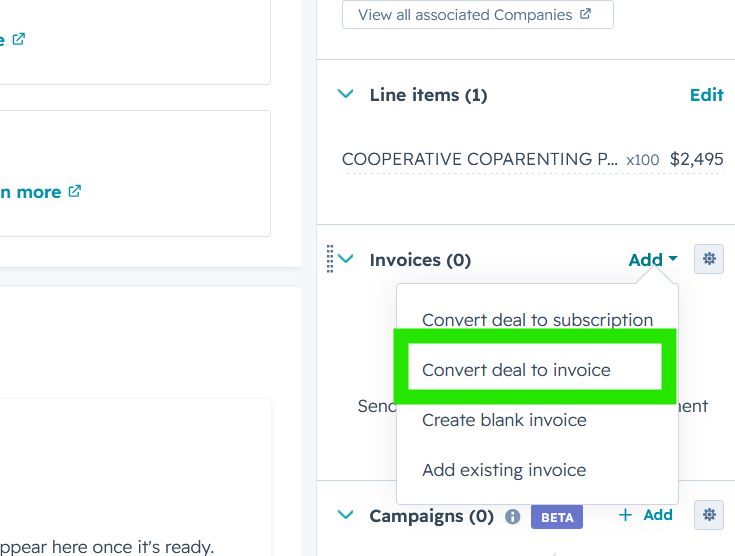
The invoice editor opens with your line item already on it, unchanged.
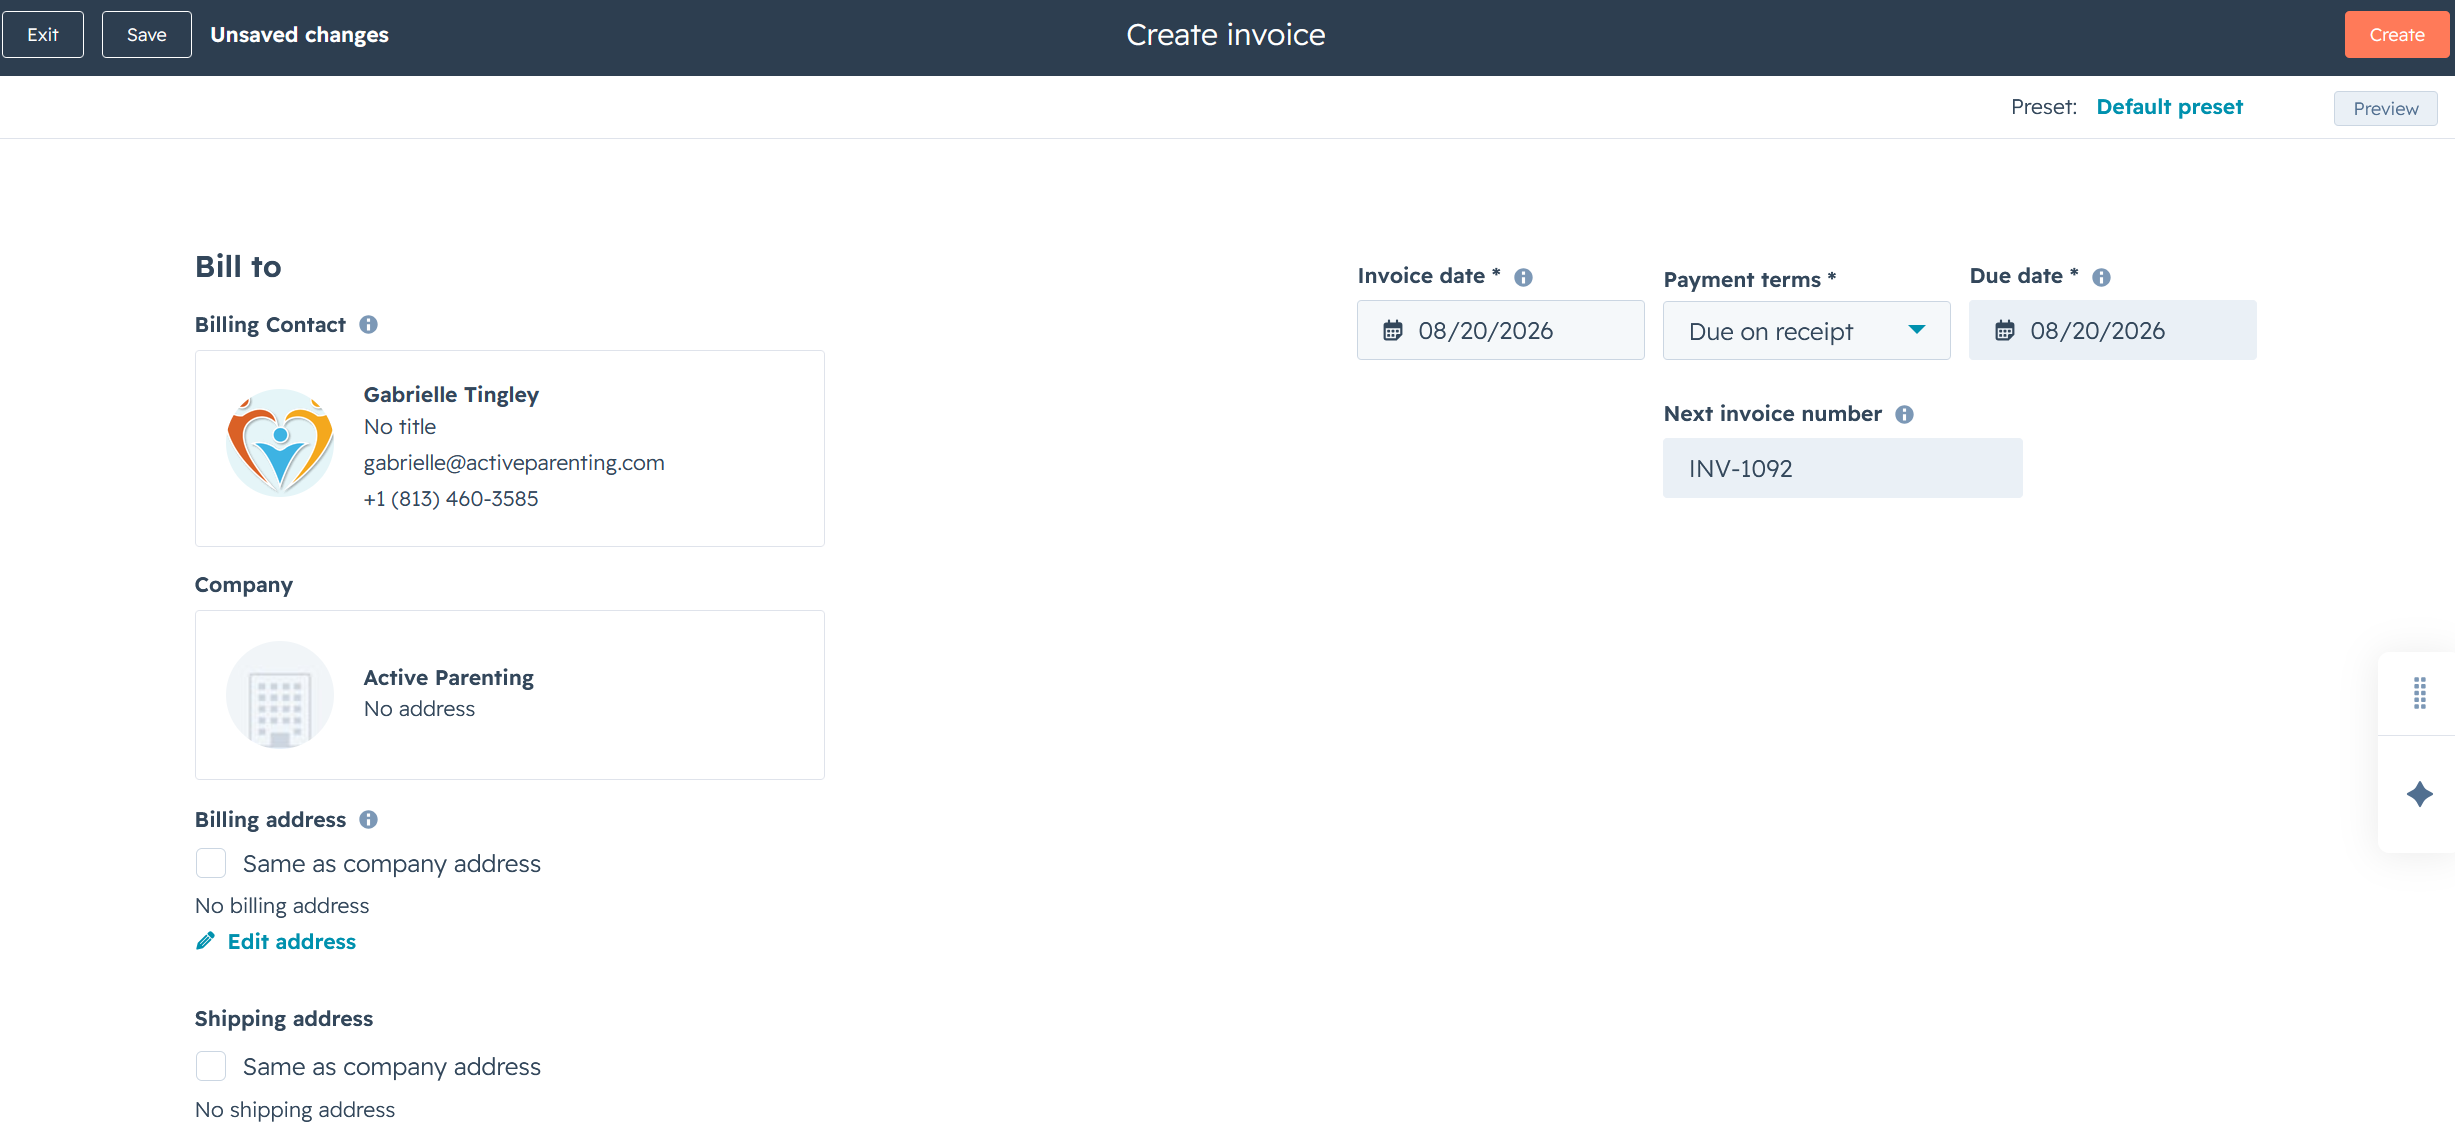
4. Create the invoice
Check the details, then click Create (top right).
Save keeps it as a draft with no real invoice number. Create finalises it — it gets its number and becomes a live invoice.
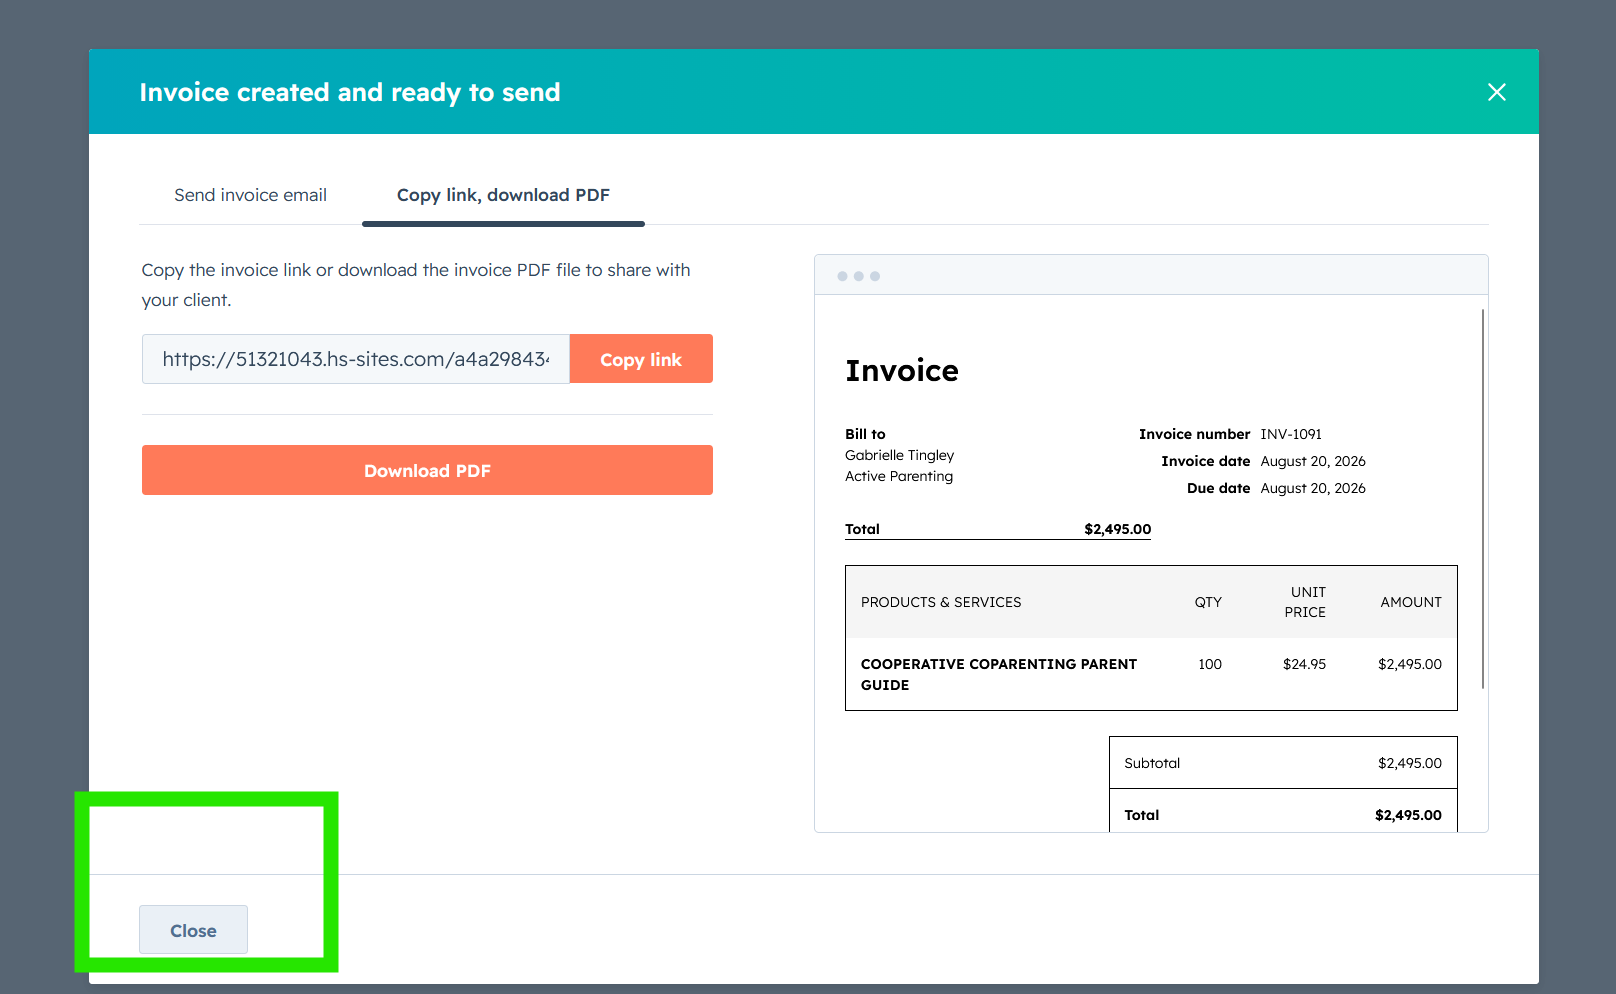
HubSpot then offers to email the invoice or download a PDF.
Don't send anything yet. The invoice at this moment is not finished — it's still at list price with no shipping and no sales tax. Sending it now means sending the customer the wrong amount. Click Close.
5. Revise the invoice
This is the step that fills everything in.
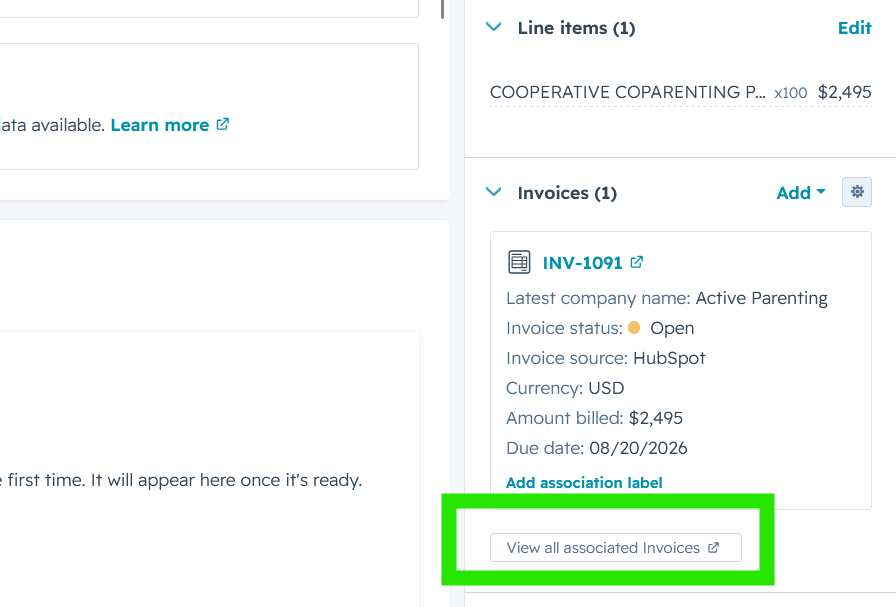
Go back to the deal and, in the Invoices panel, click through to the invoice you just created.
On the invoice, find the Revise Invoice section and click Revise Invoice Now.
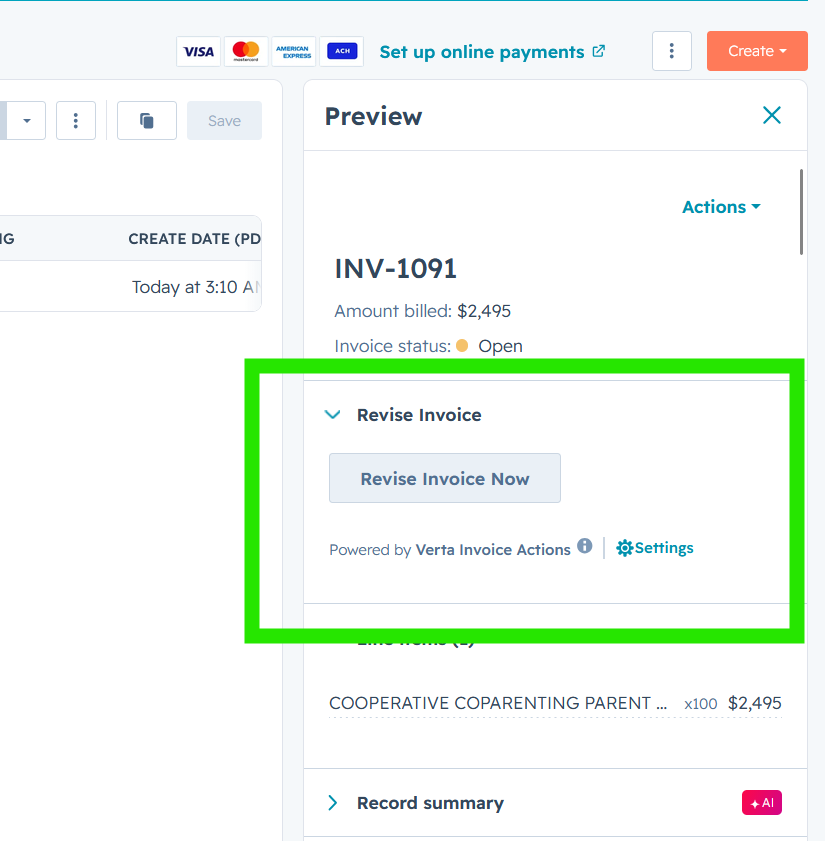
It moves through Sent → Processing → Complete, usually in under a minute.
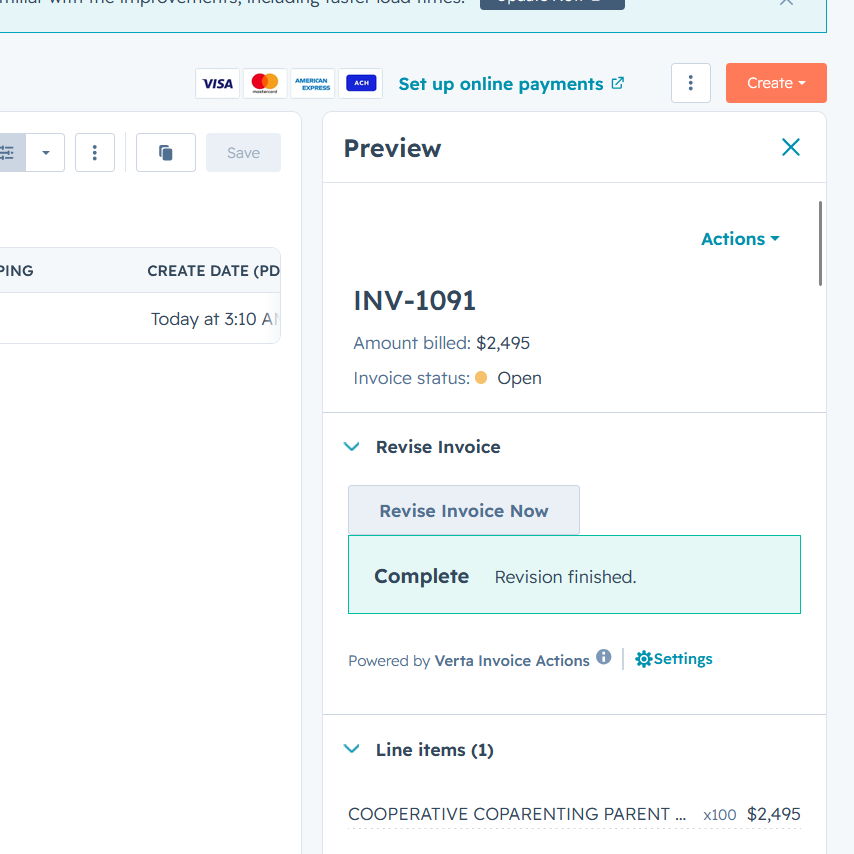
Refresh the page once it says Complete. The sales tax line can take another moment to arrive, and the page won't update on its own. If the tax line isn't there yet, wait and refresh again.
6. Check the finished invoice
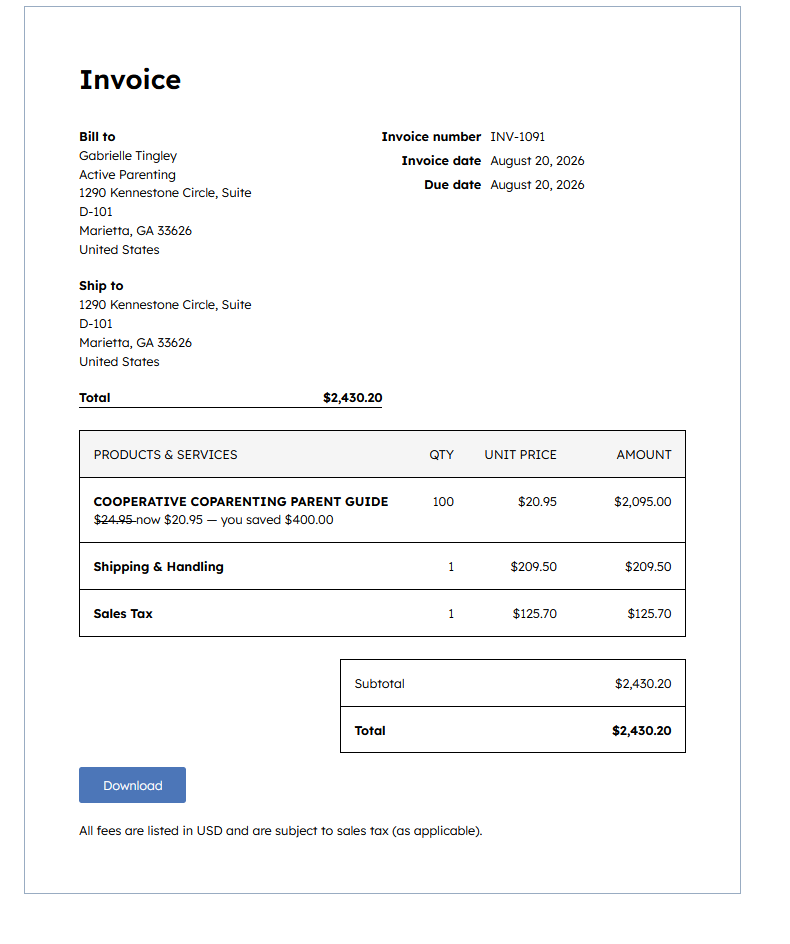
In this example:
- The price dropped from $24.95 to $20.95 — volume pricing, taken from
the product's own price breaks
- The line shows the customer what they saved: $400.00
- Shipping & Handling $209.50 was added — 10% of the discounted total,
not the list price
- Sales Tax $125.70 was added, worked out from the customer's address
- Total: $2,430.20
Once you're happy with it, you can send it.
If something doesn't look right
- Prices didn't change — check the quantity actually reaches a price
break.
- No sales tax line — normal if the customer isn't somewhere we collect
sales tax.
- The total looks stale — refresh the page. It doesn't update on its own.
- The revise button looks stuck — refresh rather than clicking it again.
- Wrong address on the invoice — fix it on the contact record, then
revise again.
Anything else, check before sending — see Submit an issue.