Create an invoice in HubSpot
Use this when you need to start a normal order. This procedure was written by actually walking through invoice creation in HubSpot, one confirmed step at a time — nothing below is speculative.
Steps
1. Create the invoice
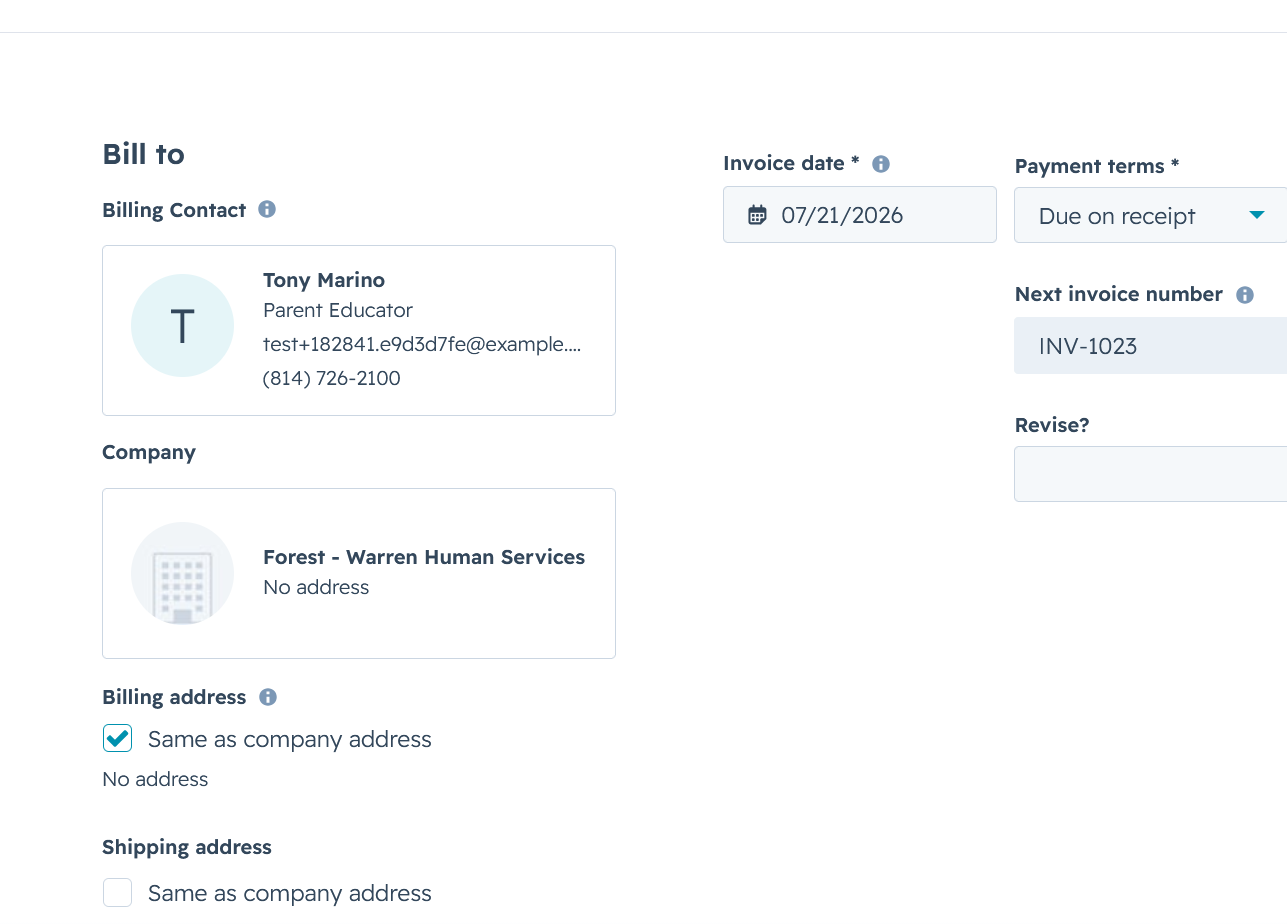
From the Invoices list, click Create invoice. HubSpot previews the next sequential invoice number before anything is saved — nothing exists yet in HubSpot at this point, this is just a preview on the form.
2. Associate the contact and company
Associate the customer's Contact record (search by name and select them) and, if applicable, their Company. Nothing is saved to HubSpot yet at this point either.
3. Open the product picker
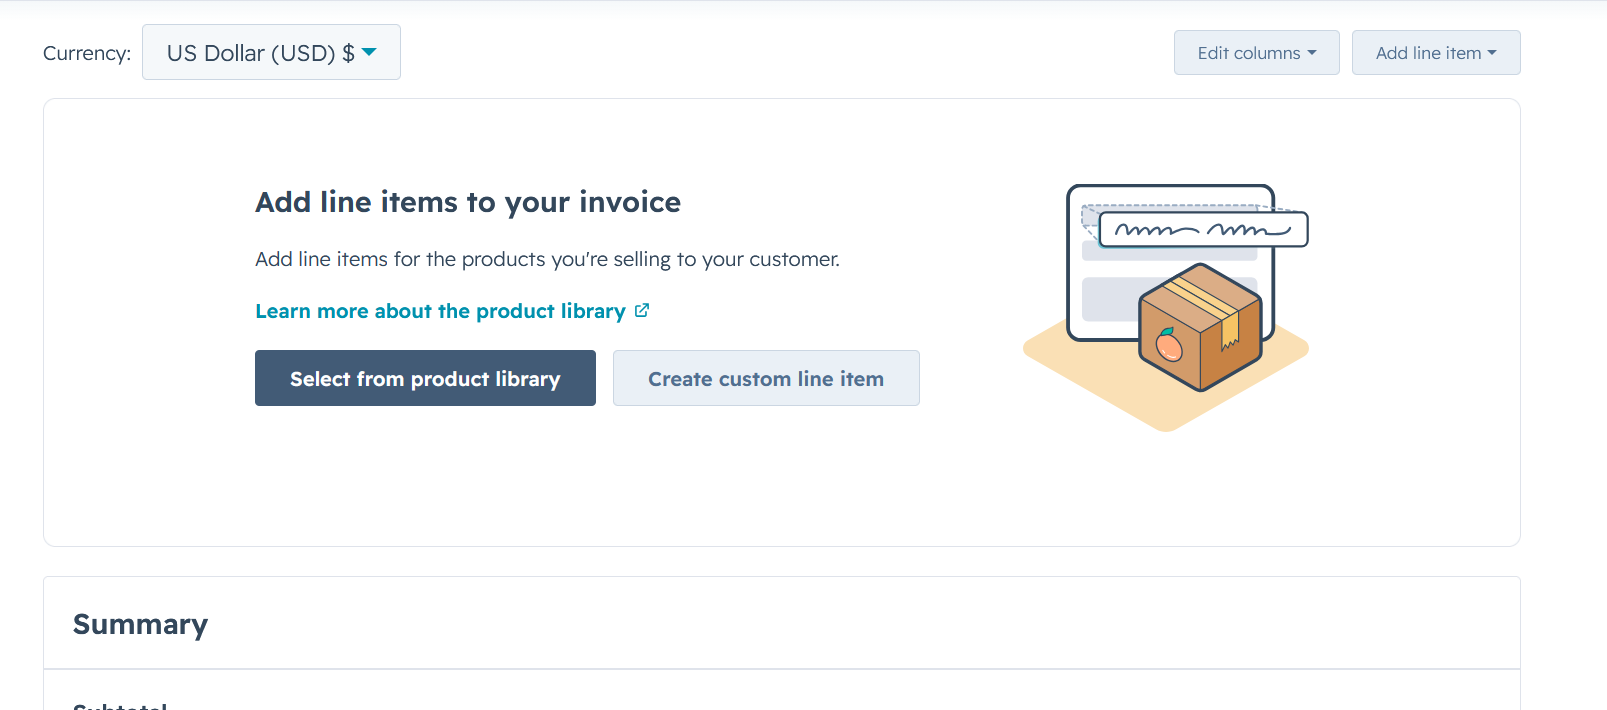
Under Add line items, click Select from product library.
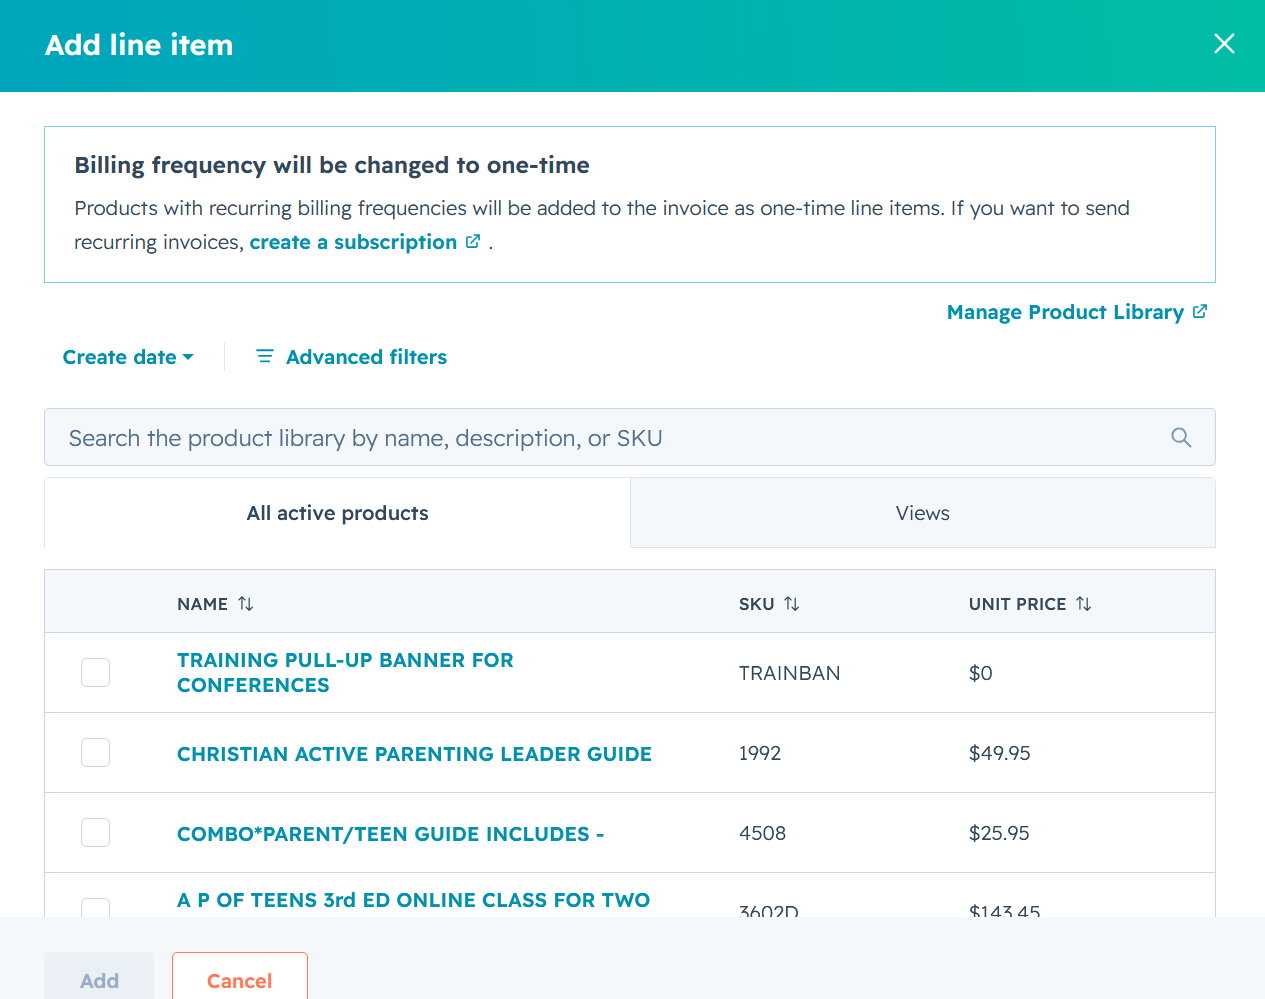
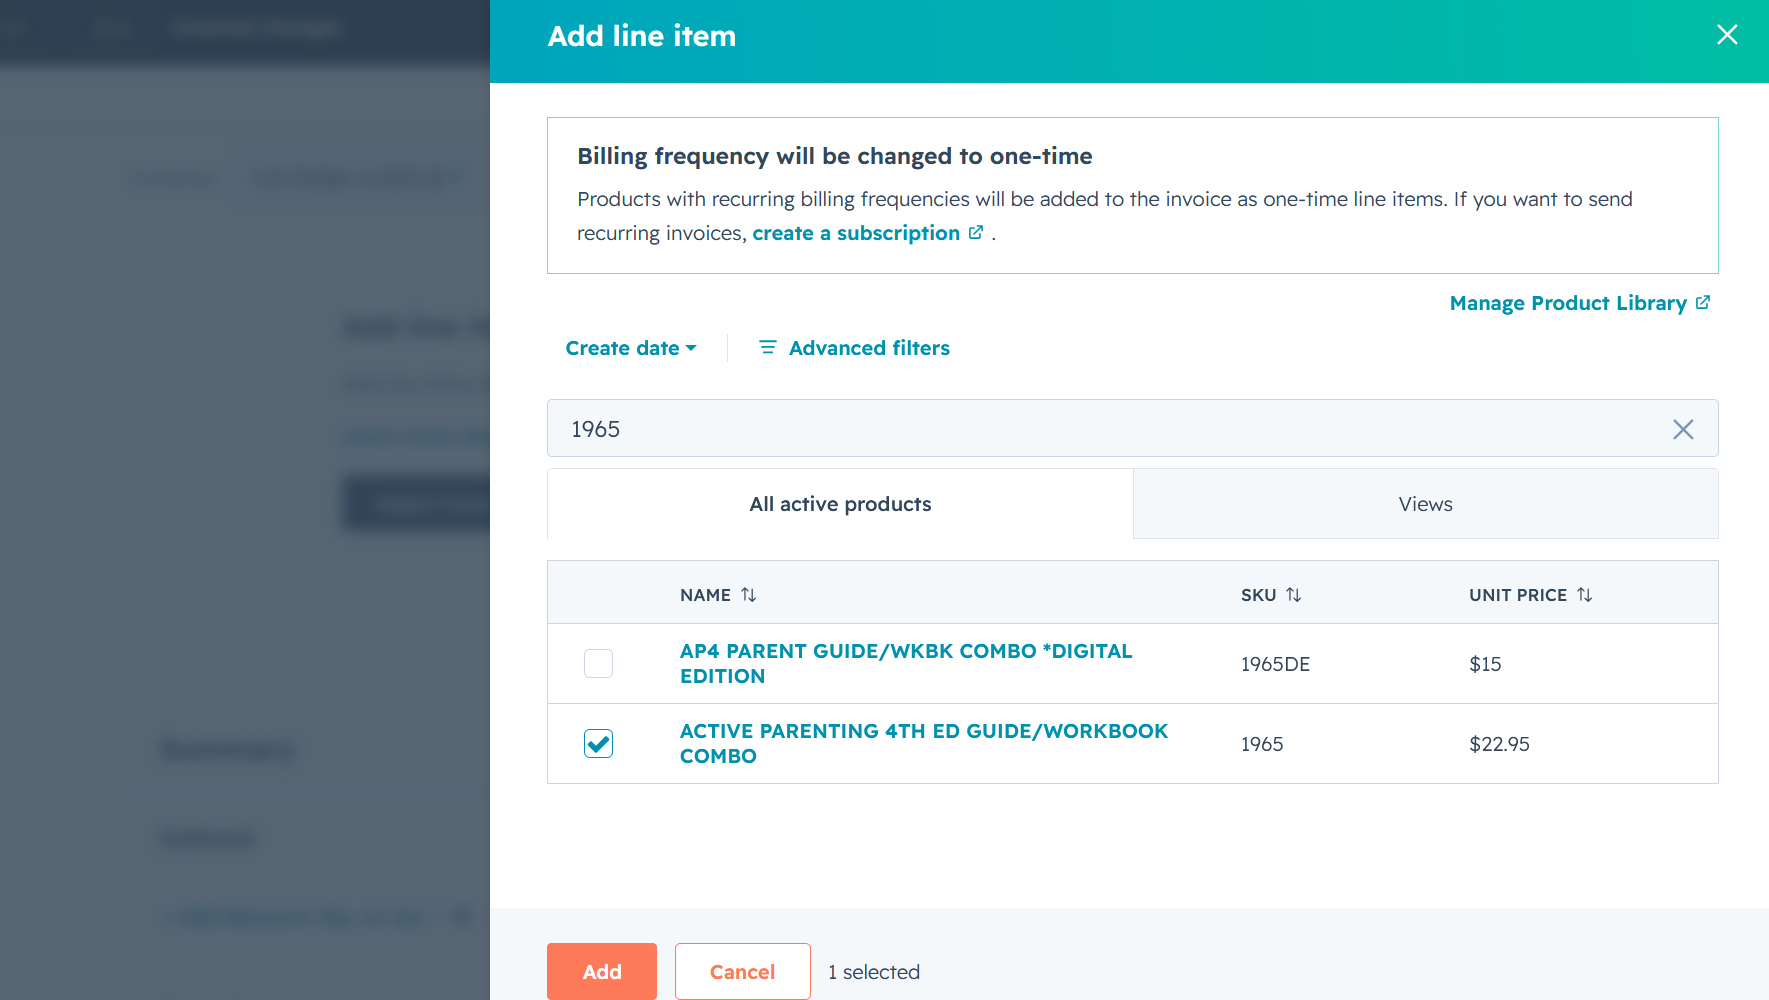
This opens a product picker with a search box and a list of products.
4. Search for the SKU
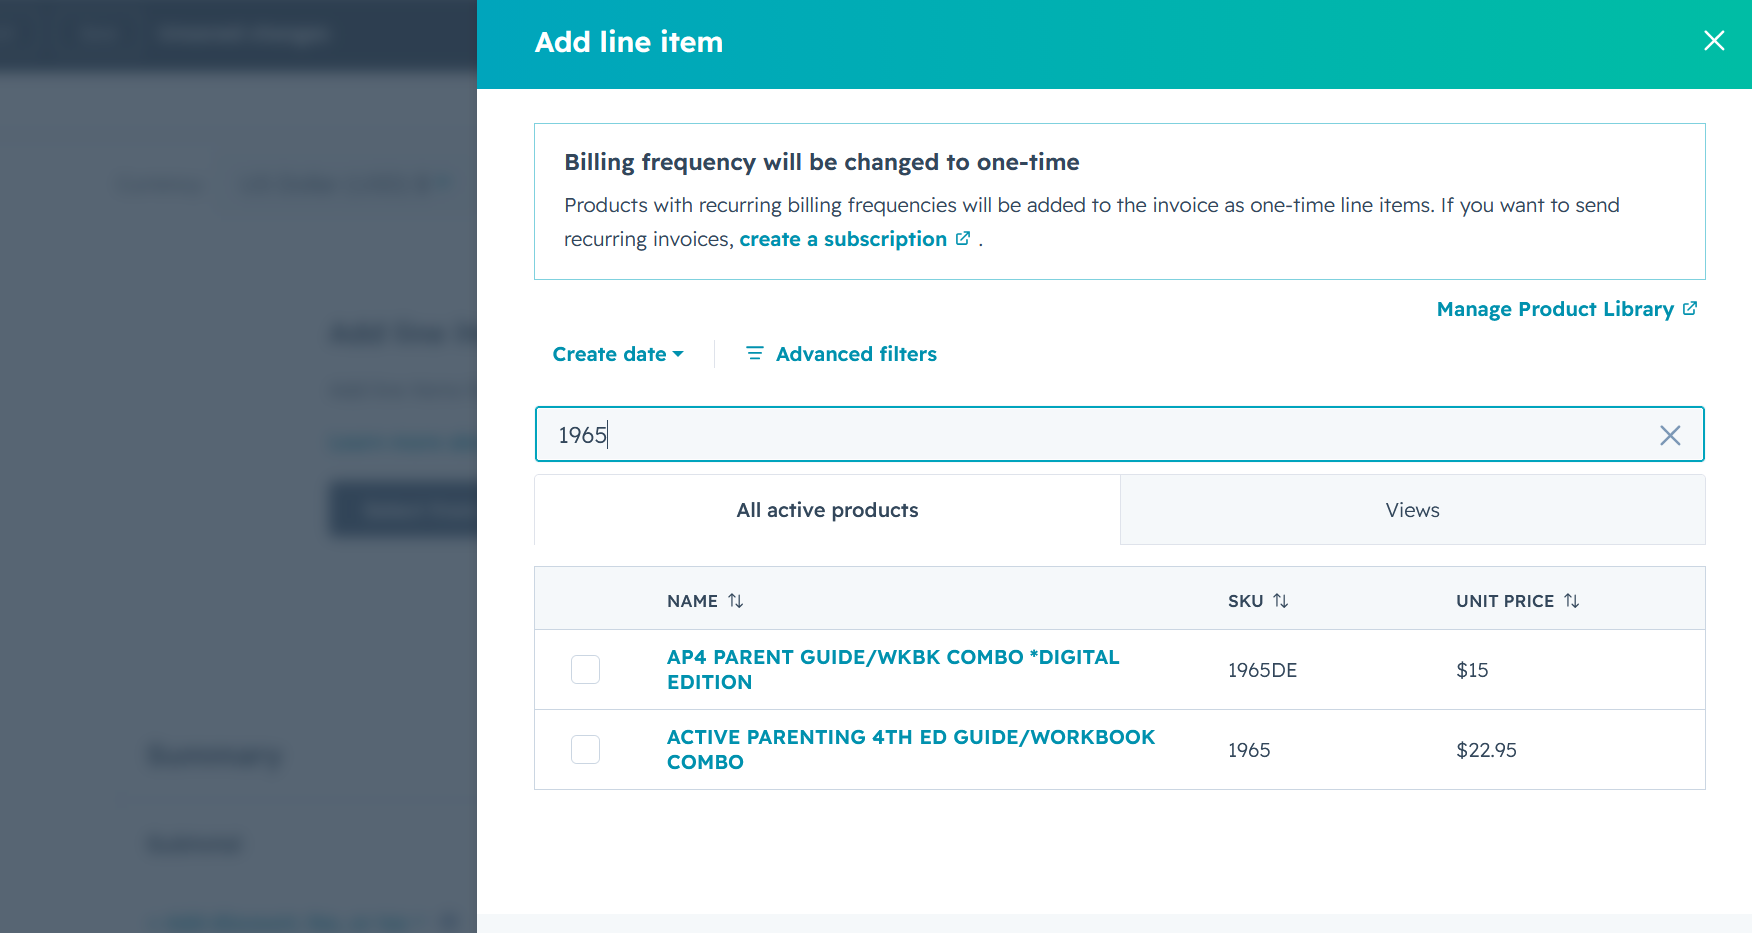
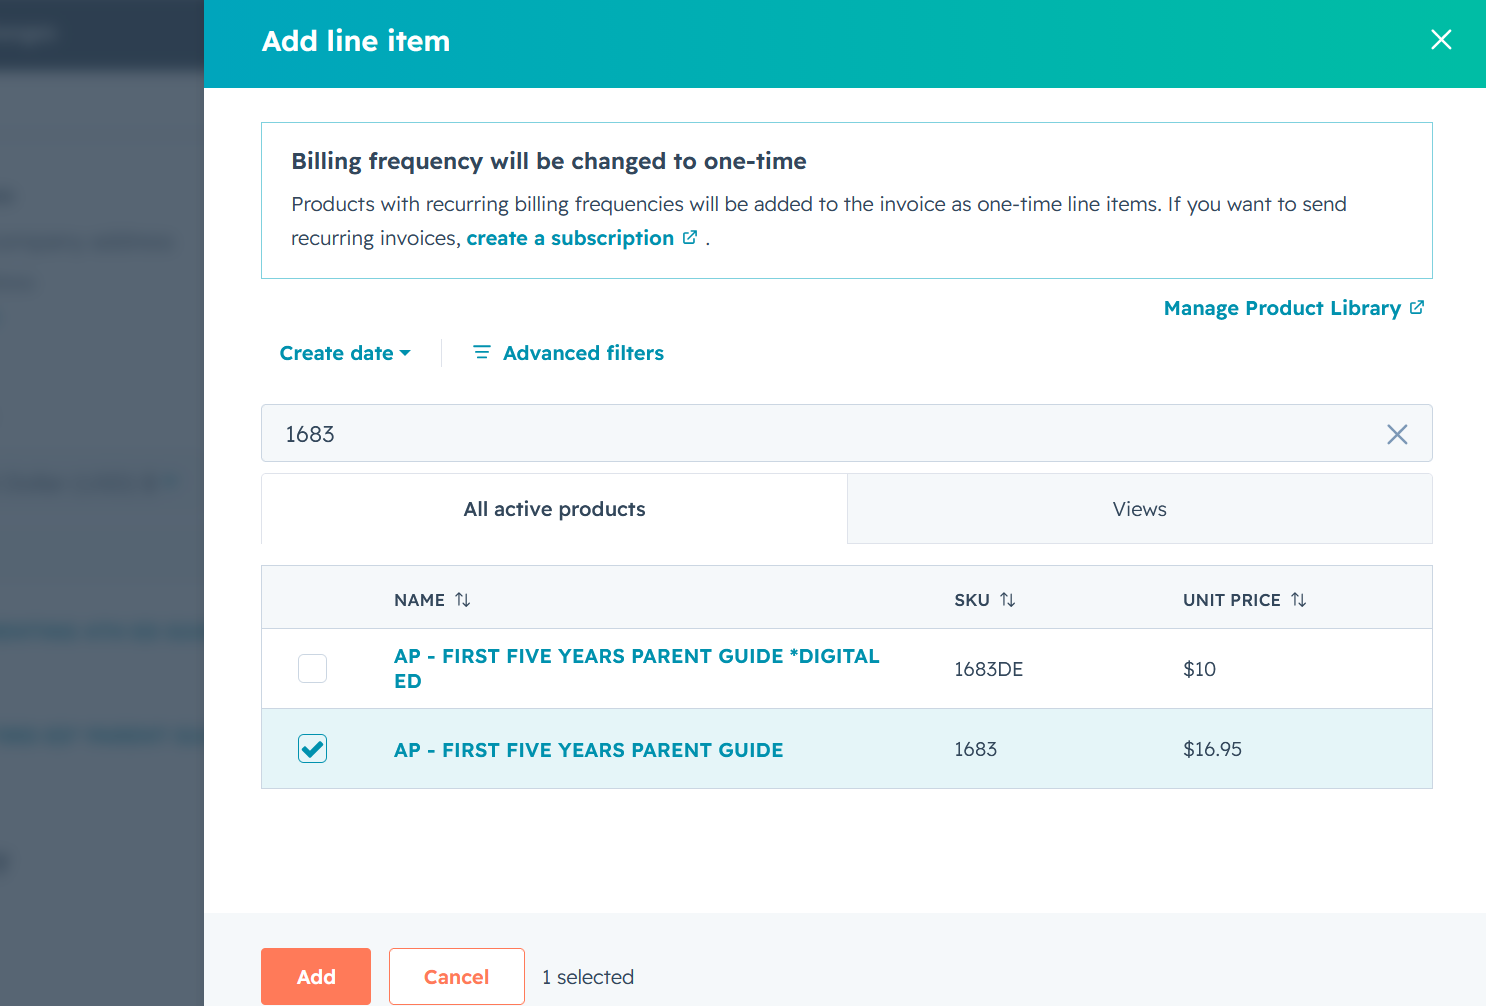
Search for the SKU you need. Watch for lookalike SKUs — searching 1965 also returns 1965DE, a distinct "Digital Edition" variant with a different price ($15.00 vs. $22.95 list). Make sure you select the exact SKU you mean, not a similarly-named variant.
5. Select and add it
Each search result has its own checkbox, and the Add button only activates once something is checked — selecting the row's text alone does not add it.
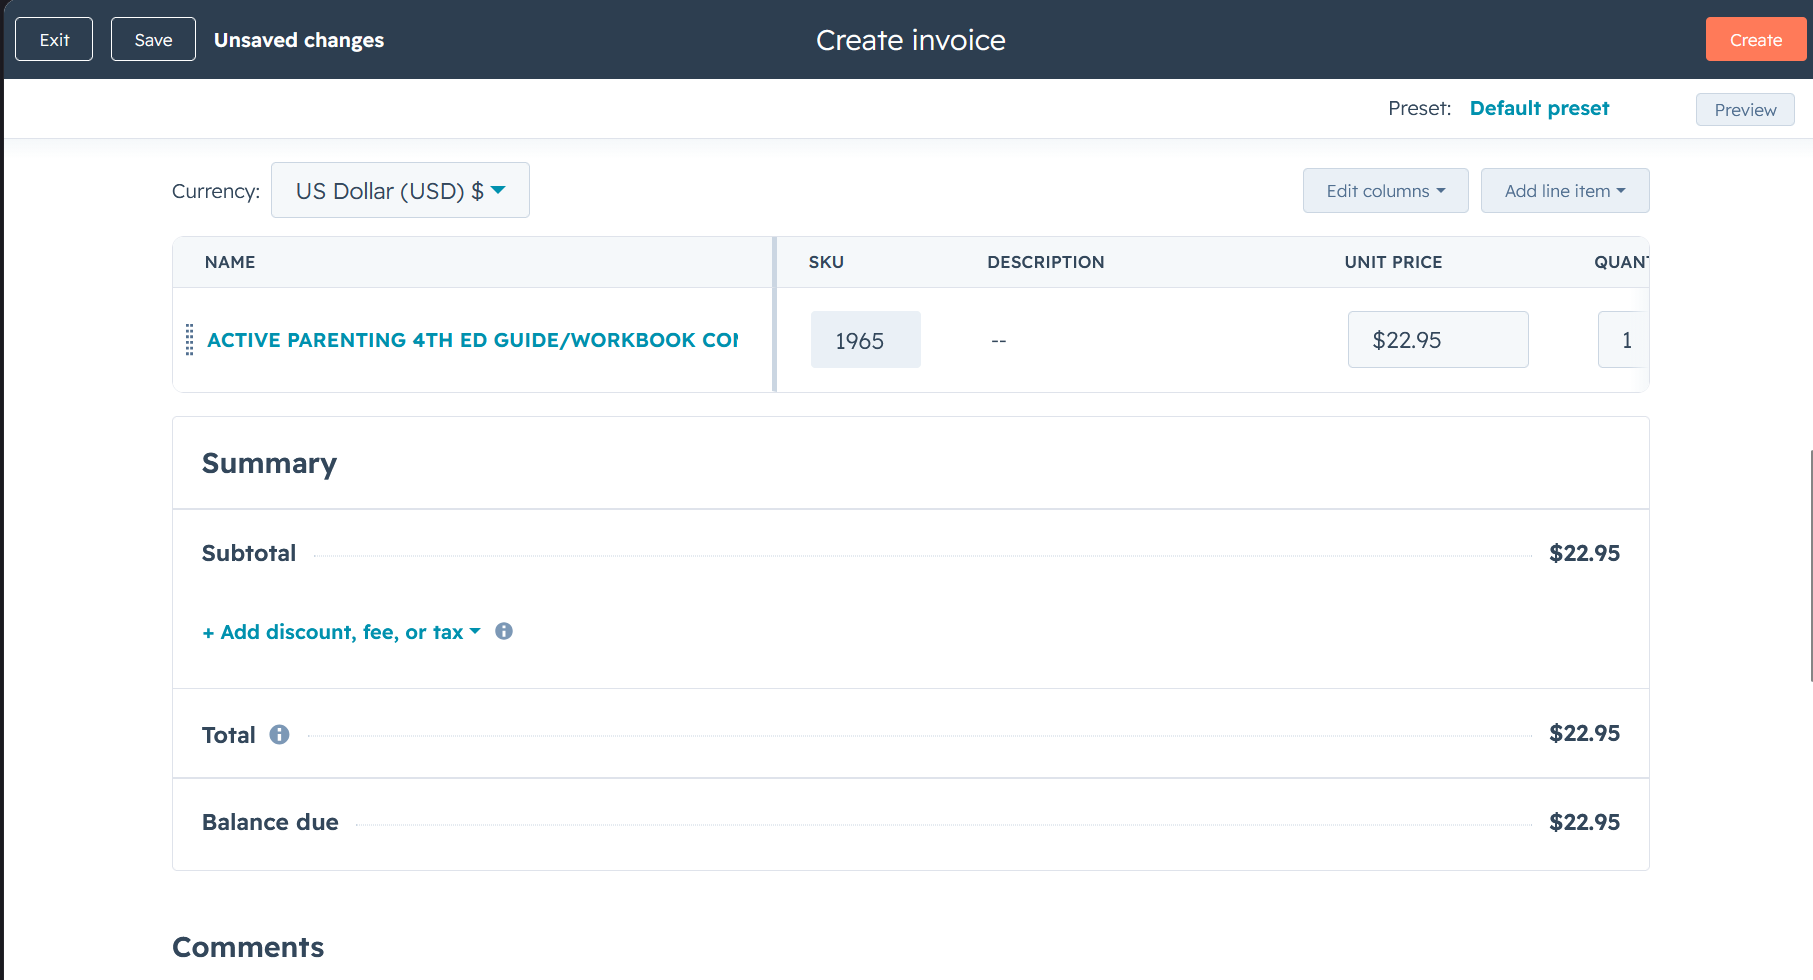
Adding a line item this way defaults its quantity to 1 — you still need to set the real quantity separately. Before you save, the top bar shows "Unsaved changes":
6. Save the draft
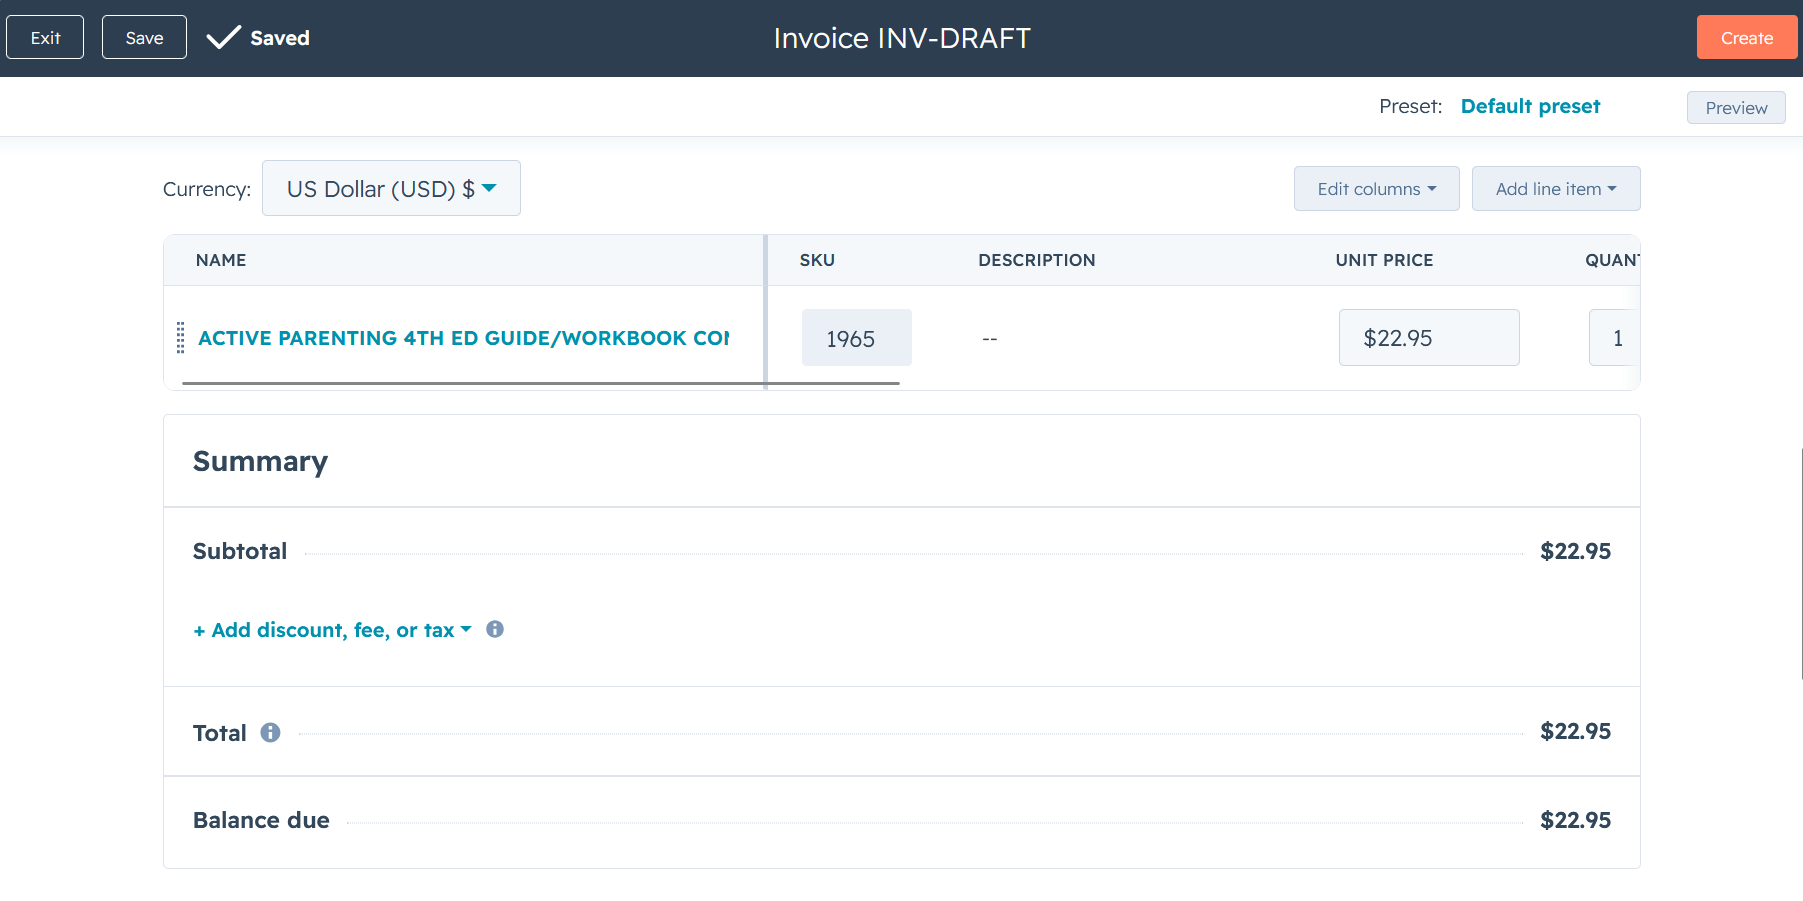
Click Save. At this point the invoice is a real object in HubSpot for the first time — before this, nothing was persisted at all, not the contact association, not the line item. Notice the invoice's title changes to "Invoice INV-DRAFT", HubSpot's generic placeholder for any not-yet-numbered invoice (more on this in the FAQ below).
7. Set the real quantity
On the line item, scroll right to find the quantity field — it's not visible without scrolling.
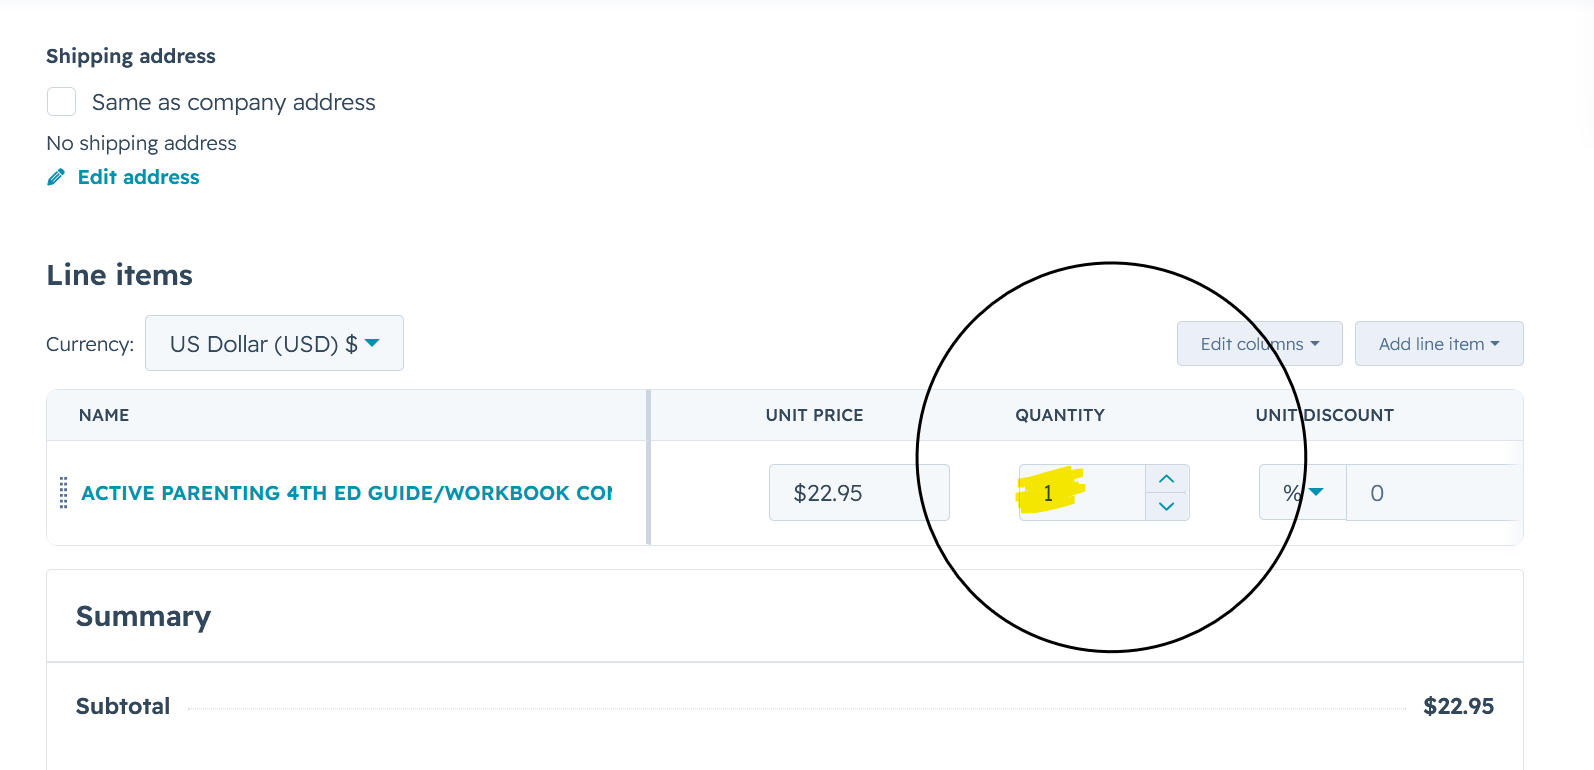
Change it to the real quantity you want. This is still just a staged, unsaved edit — the invoice on HubSpot's server still shows the old quantity until you save again.
8. Save the quantity change
Click Save to persist it. You don't need to save after every single edit — feel free to add or edit several line items before saving.
9. Add any additional line items
Once at least one line item already exists, the button to add another moves — it's now a small Add line item button in the top-right corner of the line items section, not the original larger entry point used for the first one.
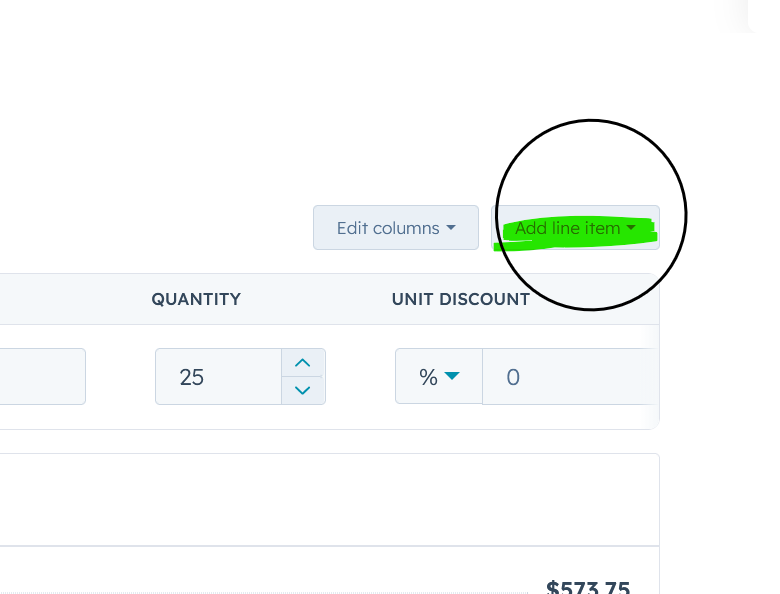
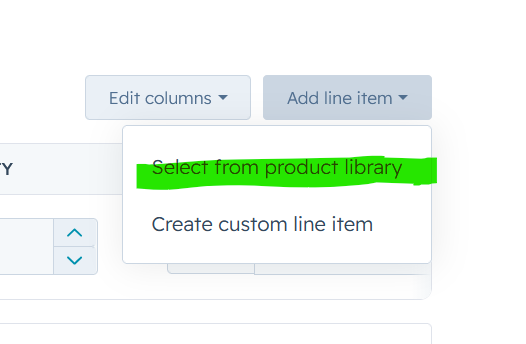
Clicking it opens a dropdown; choose Select from product library again.
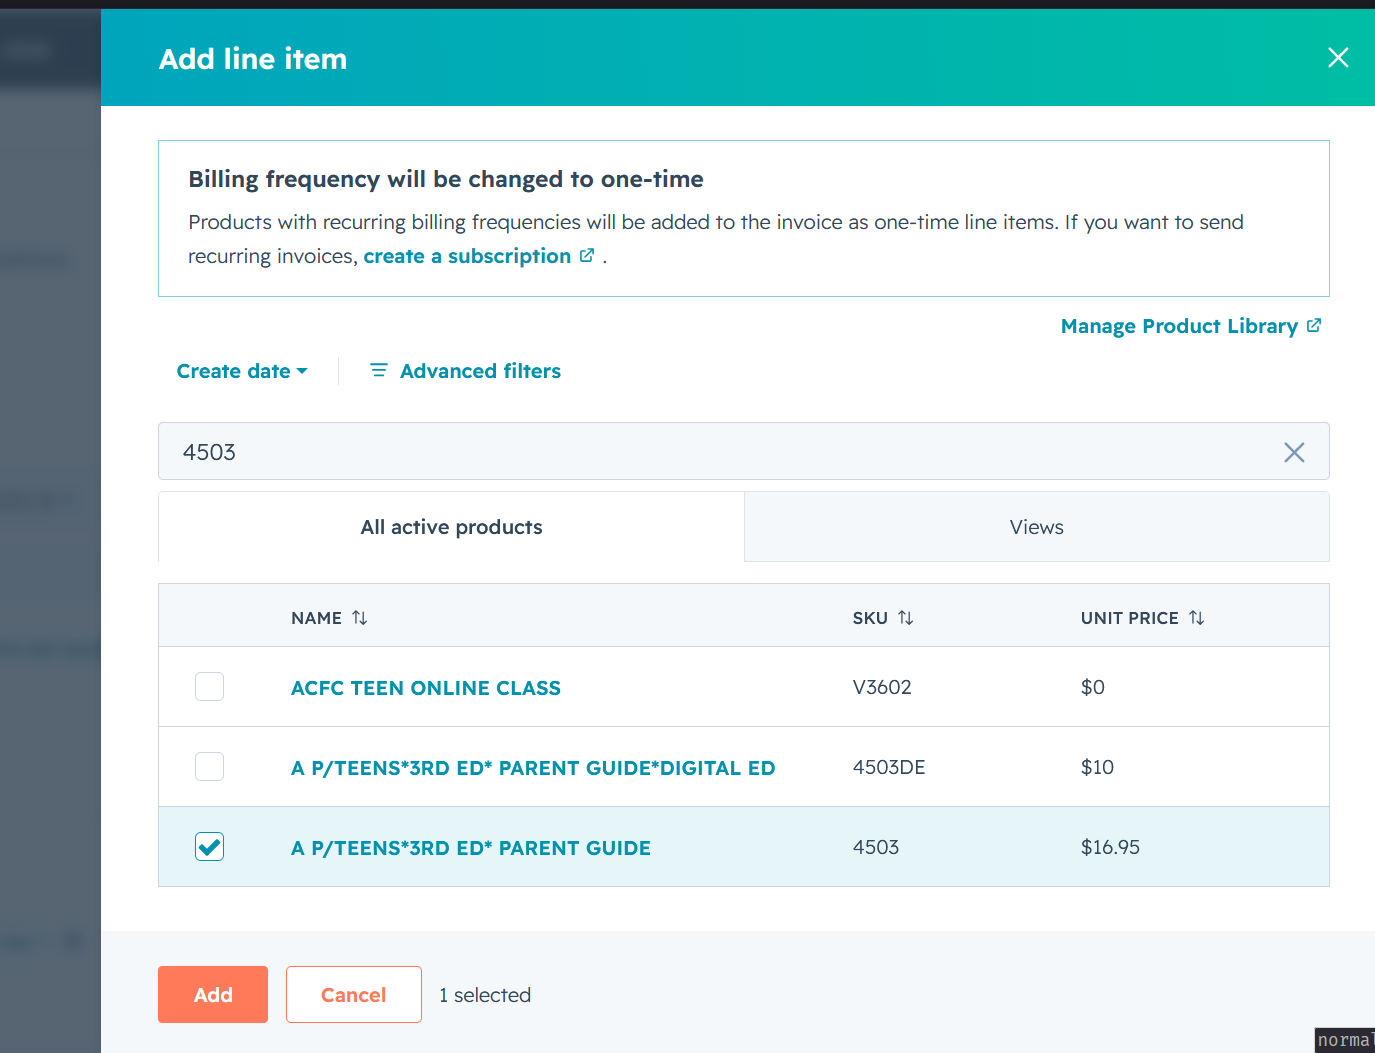
Search by SKU (again, watch for lookalikes — searching 4503 also returns 4503DE), click Add, and set the real quantity.
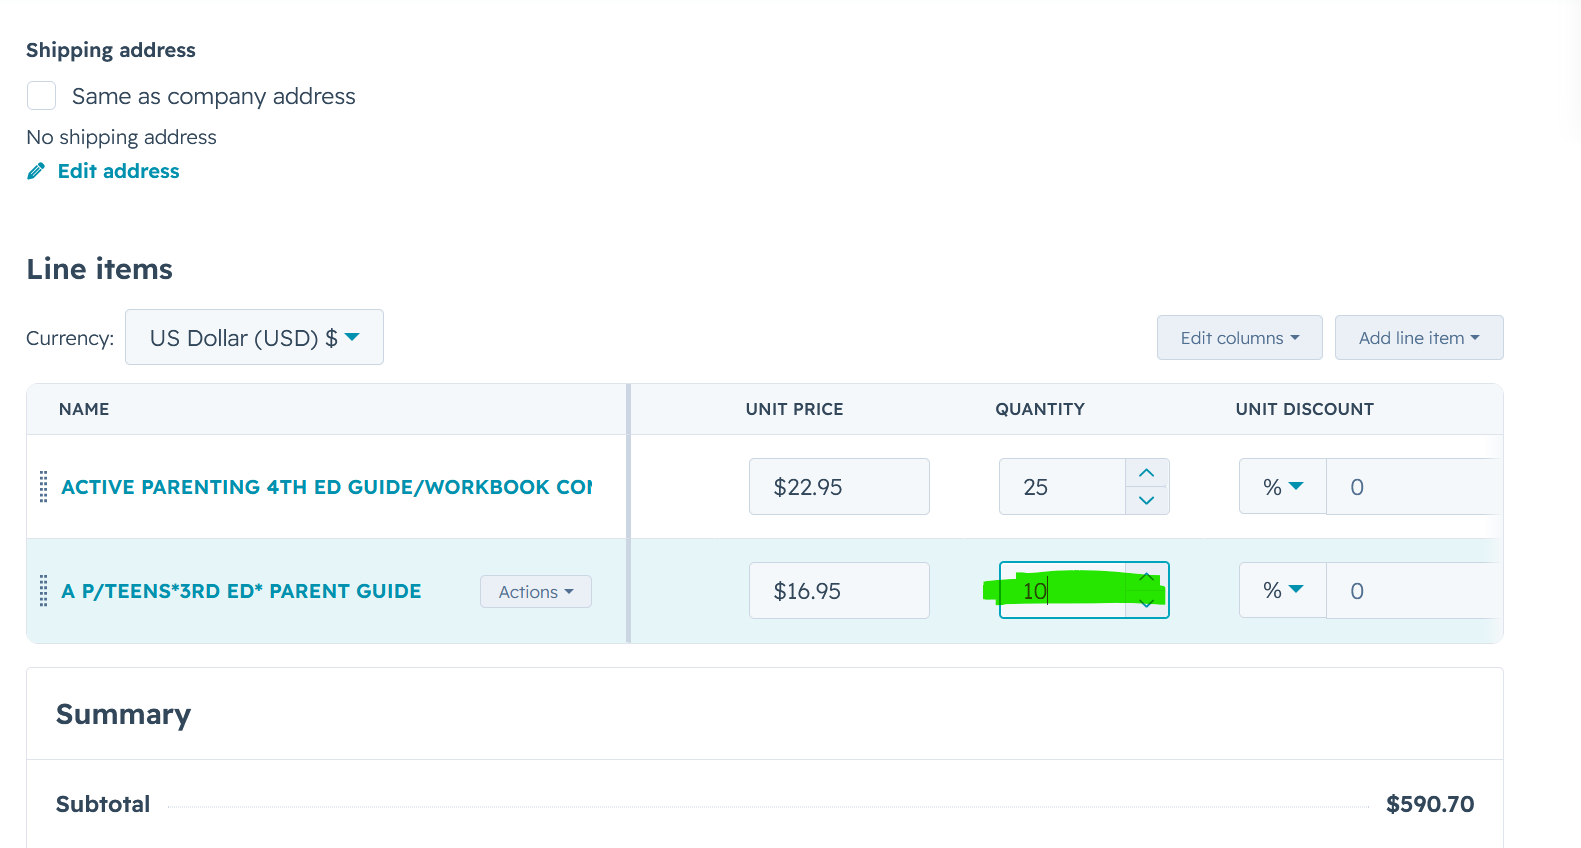
You can add and adjust several line items before saving — there's no need to save after each one.
10. Save all line items
Once every line item is added with the correct quantity, click Save. The invoice still shows list prices with no tiering, shipping, or savings applied yet — that's expected, since none of that runs until you trigger revision.
11. Trigger revision
Exit the invoice editor back to Revenue → Invoices, click the invoice's row to open its preview sidebar, and click Revise Invoice Now. (If the card isn't in your sidebar yet, see How to revise invoices using the preview sidebar for the one-time setup.)
This is a real change that triggers automatic backend processing (breakout expansion, price tiering, shipping placeholder, savings line) — it can take anywhere from under a minute to several minutes in practice. The button's Sent/Failed result only confirms the request was received, not that processing has finished — wait for it, then re-open the invoice and check that the line items now show the expected updates before moving on.
12. Open the invoice
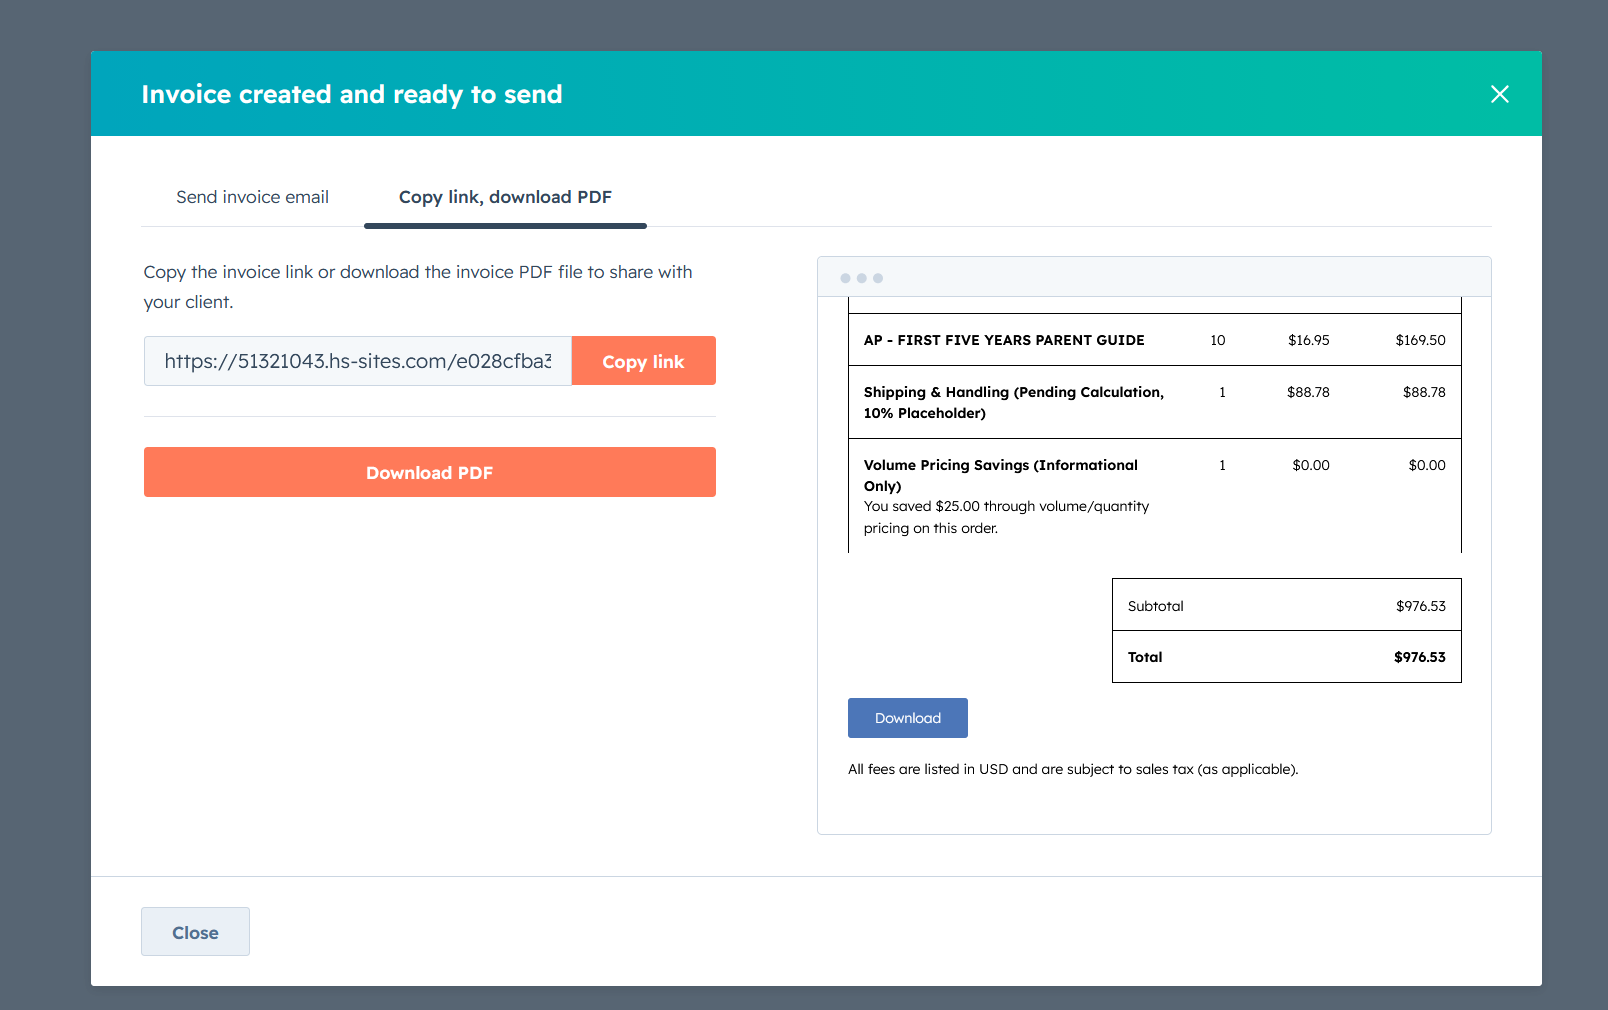
Once revision has finished, click Create. This is the point where the invoice gets its real, final invoice number, and HubSpot renders an actual PDF for the first time.
13. Confirm the result
Check that the rendered PDF shows the correct totals, tiered pricing, shipping line, and savings line — all reflecting the revision that already happened in step 11, not recalculated fresh at this step.
If something looks wrong
Do not run shipping yet. Check the HubSpot sync status and fix any sync error first.
Frequently Asked Questions
What's the difference between draft, revise, and open?
Creating an invoice, adding its line items, and saving does not immediately produce a customer-facing PDF or run price/shipping calculations. There are three distinct stages:
- Draft — the invoice exists, with its contact and line items, but nothing has been calculated yet.
- Revise — clicking Revise Invoice Now in the preview sidebar triggers automatic processing (breakout expansion, price tiering, shipping placeholder, savings line) while the invoice is still in draft.
- Open — only moving the invoice from draft to open causes HubSpot to render an actual customer-facing PDF for the first time.
Don't open an invoice before triggering revision, or the totals/PDF won't reflect the automatic processing yet.
What do Save, Create, and the Revise button actually do?
The invoice editor's top bar has two actions relevant here: Save and Create.
- Save saves the invoice as a draft. You can click this at any
point while building the invoice — it does not finalize anything and does not open the invoice. There's no requirement to save after every single change.
- Create creates and opens the invoice in one step. Do not click
this until you're done adding line items and have triggered revision — clicking Create early opens the invoice before automatic processing has run, so it will look wrong.
Revise Invoice Now lives in a different place — the invoice's preview sidebar (Revenue → Invoices → click the row), not the editor itself. See How to revise invoices using the preview sidebar.
Revision works on draft invoices — you do not need to click Create first. It's easy to assume automatic processing requires an "open" invoice, but that's not the case. What's actually excluded on drafts is HubSpot's separate sync to QuickBooks — a later step that only begins once the invoice is opened. The recommended order:
- Finish adding and correcting every line item, and Save.
- Exit to Revenue → Invoices, open the invoice's preview sidebar, and click Revise Invoice Now. Wait for processing to finish (can take up to several minutes) — check the invoice's line items directly, since the button's immediate response only confirms the request was received, not that it's done.
- Only after that finishes, re-open the invoice in the editor and click Create to open it.
Doing it in this order means the invoice opens already fully processed — the first PDF you see, and the first thing QuickBooks sync picks up, both already reflect the correct, final numbers. Opening first and revising afterward works too, but the invoice will briefly look wrong/incomplete before you revise it, and QuickBooks sync may pick up incomplete data on its first attempt.
Why did my invoice's number change?
The number the create form previews before you save (e.g. INV-1023) is not what gets assigned once you actually save as a draft — HubSpot shows a placeholder (INV-DRAFT) while the invoice is in draft status. The real, final invoice number is only assigned once the invoice is opened, and it may or may not match the number the form originally previewed — in one real run it matched exactly, but HubSpot's numbering isn't guaranteed to work that way, so treat the early preview as informational only, not a promise.
Why isn't there a tax line on my invoice?
You will never see a Sales Tax line while an invoice is in draft, no matter how many times you revise it. Tax is calculated by QuickBooks, not HubSpot, and only after this invoice syncs to QuickBooks — which structurally cannot happen until the invoice is opened. A missing tax line on a draft invoice is expected, not a bug.